Setting Up Programming Environment
Objectives
In this episode, we provide comprehensive, step-by-step instructions for setting up programming environments and running tutorials, whether you choose to work on your personal computer or through Google Colab platform.
1. Using Personal Computer
Below are detailed instructions for installing required packages and their dependencies on a local computer or server.
1.1 Install miniforge
If you already have a preferred way to manage Python versions and libraries, you can stick to that. Otherwise, we recommend you to install Python3 and all required libraries using Miniforge, a free minimal installer for package, dependency, and environment manager Conda.
Please follow installation instructions to install Miniforge.
After installation, verify that Conda is installed correctly by running:
$ conda --version
# Example output: conda 24.11.2
1.2 Configure programming environment
With Conda installed, open Anaconda Prompt terminal, and run command below to install required packages and depenencies (except PyTorch).
$ conda env create -y --file=https://raw.githubusercontent.com/ENCCS/data-wrangling-fundamentals/main/content/env/environment.yml
This creates a new environment called practical_data_wraggling, and we activate it before running tutorials.
$ conda activate practical_data_wraggling
Warning
Remember to activate your programming environment each time before running code examples. This ensures that correct Python version and all required dependencies are available. If you forget to activate it, you may encounter errors or missing packages.
1.3 Validate programming environment
Once programming environment is fully set up, open a new Anaconda Prompt terminal (just as you should do each time before running code examples), activate programming environment, and launch JupyterLab by running command below.
$ conda activate practical_data_wraggling
$ jupyter lab
This will start a Jupyter server and automatically open JupyterLab interface in your web browser.
To verify that all required packages are properly installed, follow these steps:
Open JupyterLab (see instructions above).
Create a new Jupyter Notebook by selecting File → New → Notebook.
Copy code examples listed below into a cell of notebook.
Run cell (press Shift + Enter or click the Run button).
    import numpy; print("numpy:", numpy.__version__)
    import pandas; print("pandas:", pandas.__version__)
    import scipy; print("scipy:", scipy.__version__)
    import matplotlib; print("matplotlib:", matplotlib.__version__)
    import seaborn; print("seaborn:", seaborn.__version__)
    import sklearn; print("scikit-learn:", sklearn.__version__)
    import nltk; print("nltk:", nltk.__version__)
    import spacy; print("spacy:", spacy.__version__)
    import tensorflow; print('tensorflow:', tensorflow.__version__)
    import torch; print("torch:", torch.__version__)
    import transformers; print("transformers:", transformers.__version__)
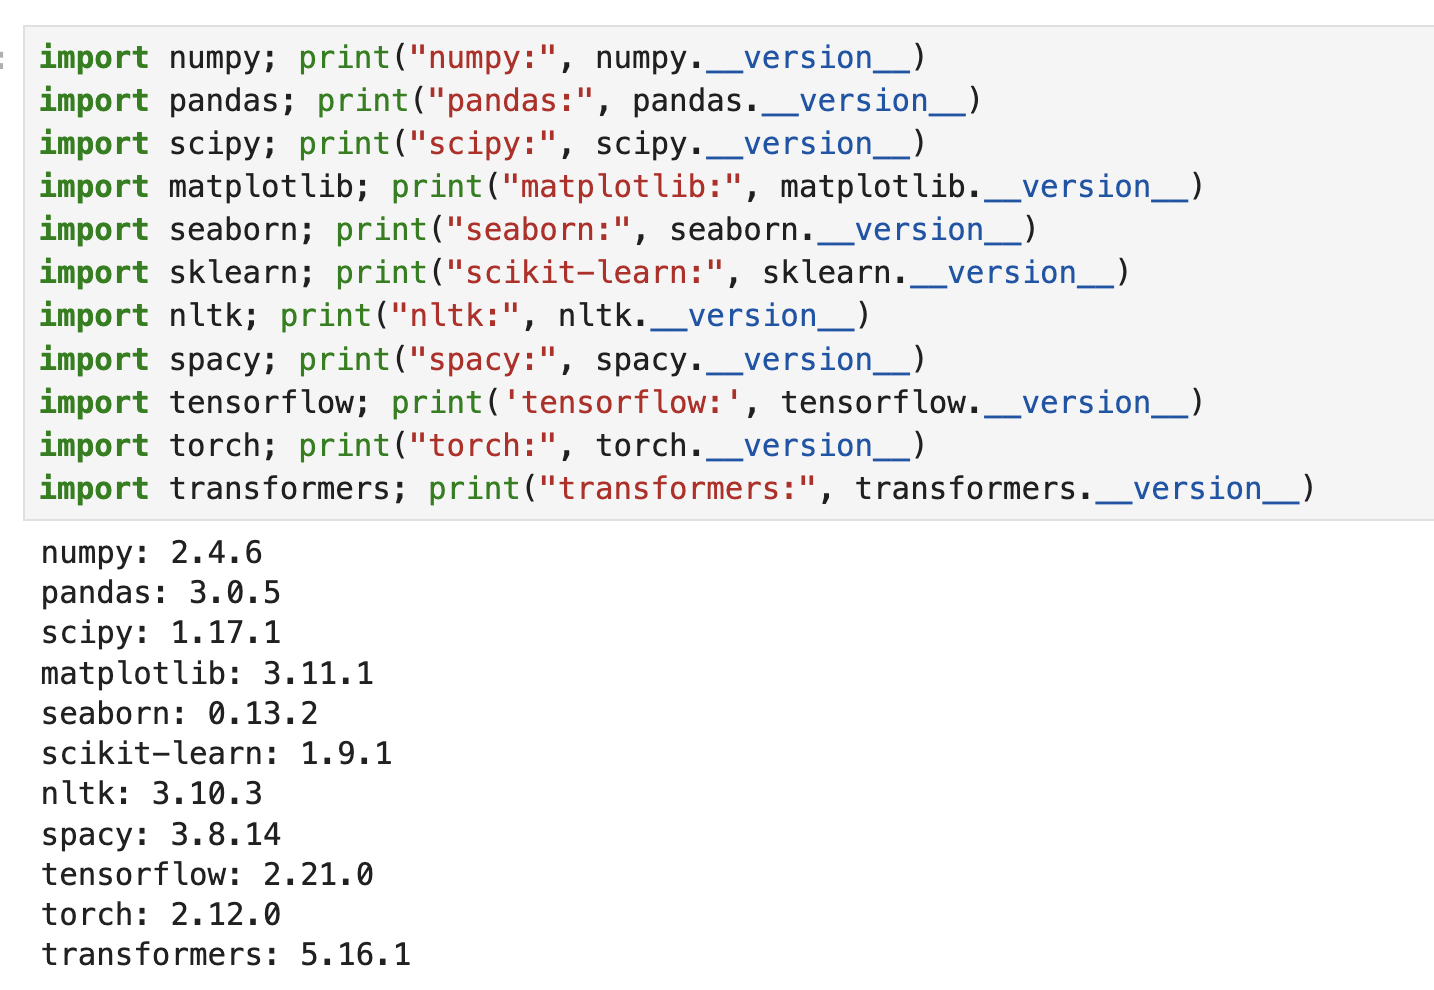
You should see similar outputs listed in figure below. The exact package versions may vary depending on when you installed them. If code runs without errors, it means that all packages are correctly installed and your programming environment is ready to use.
from IPython.display import display, Image
display(Image("./verification-programming-environment.png", width=1024))
Note
If you are using VS Code, you can select installed practical_data_wraggling programming environment as follows:
Open your project folder in VS Code.
In upper-right corner of editor window (when working with a Python file or Jupyter Notebook), click on Select Kernel.
From list of Python Environments, locate and choose
practical_data_wragglingenvironment (which you have installed earlier).Once selected, VS Code will use this environment for running Python code and Jupyter Notebooks, ensuring that all required packages are available.
Run Jupyter Notebook and verify the programming environment.
Warning
For Windows users, if you encounter any dependency-related errors, you can install the required packages individually by following the instructions below.
    conda create -n practical_data_wraggling python=3.11 -y
    conda activate practical_data_wraggling

    conda install -y numpy pandas scipy matplotlib seaborn scikit-learn nltk jupyter jupyterlab

    pip install spacy
    python -m spacy download en_core_web_sm

    pip install torch
    pip install transformers tensorflow
After installation, run Jupyter Notebook and verify the programming environment.
2. Using Google Colab
You can also run all code examples in tutorials using Google Colab, a free cloud-based platform that provides Jupyter Notebook environments with preinstalled ML libraries.
2.1 Upload Jupyter NBs from GitHub to Google Drive
You can run tutorials directly on Google Colab by following steps:
Go to Google Colab and sign in with your Google account.
In top menu, click File → upload notebook.
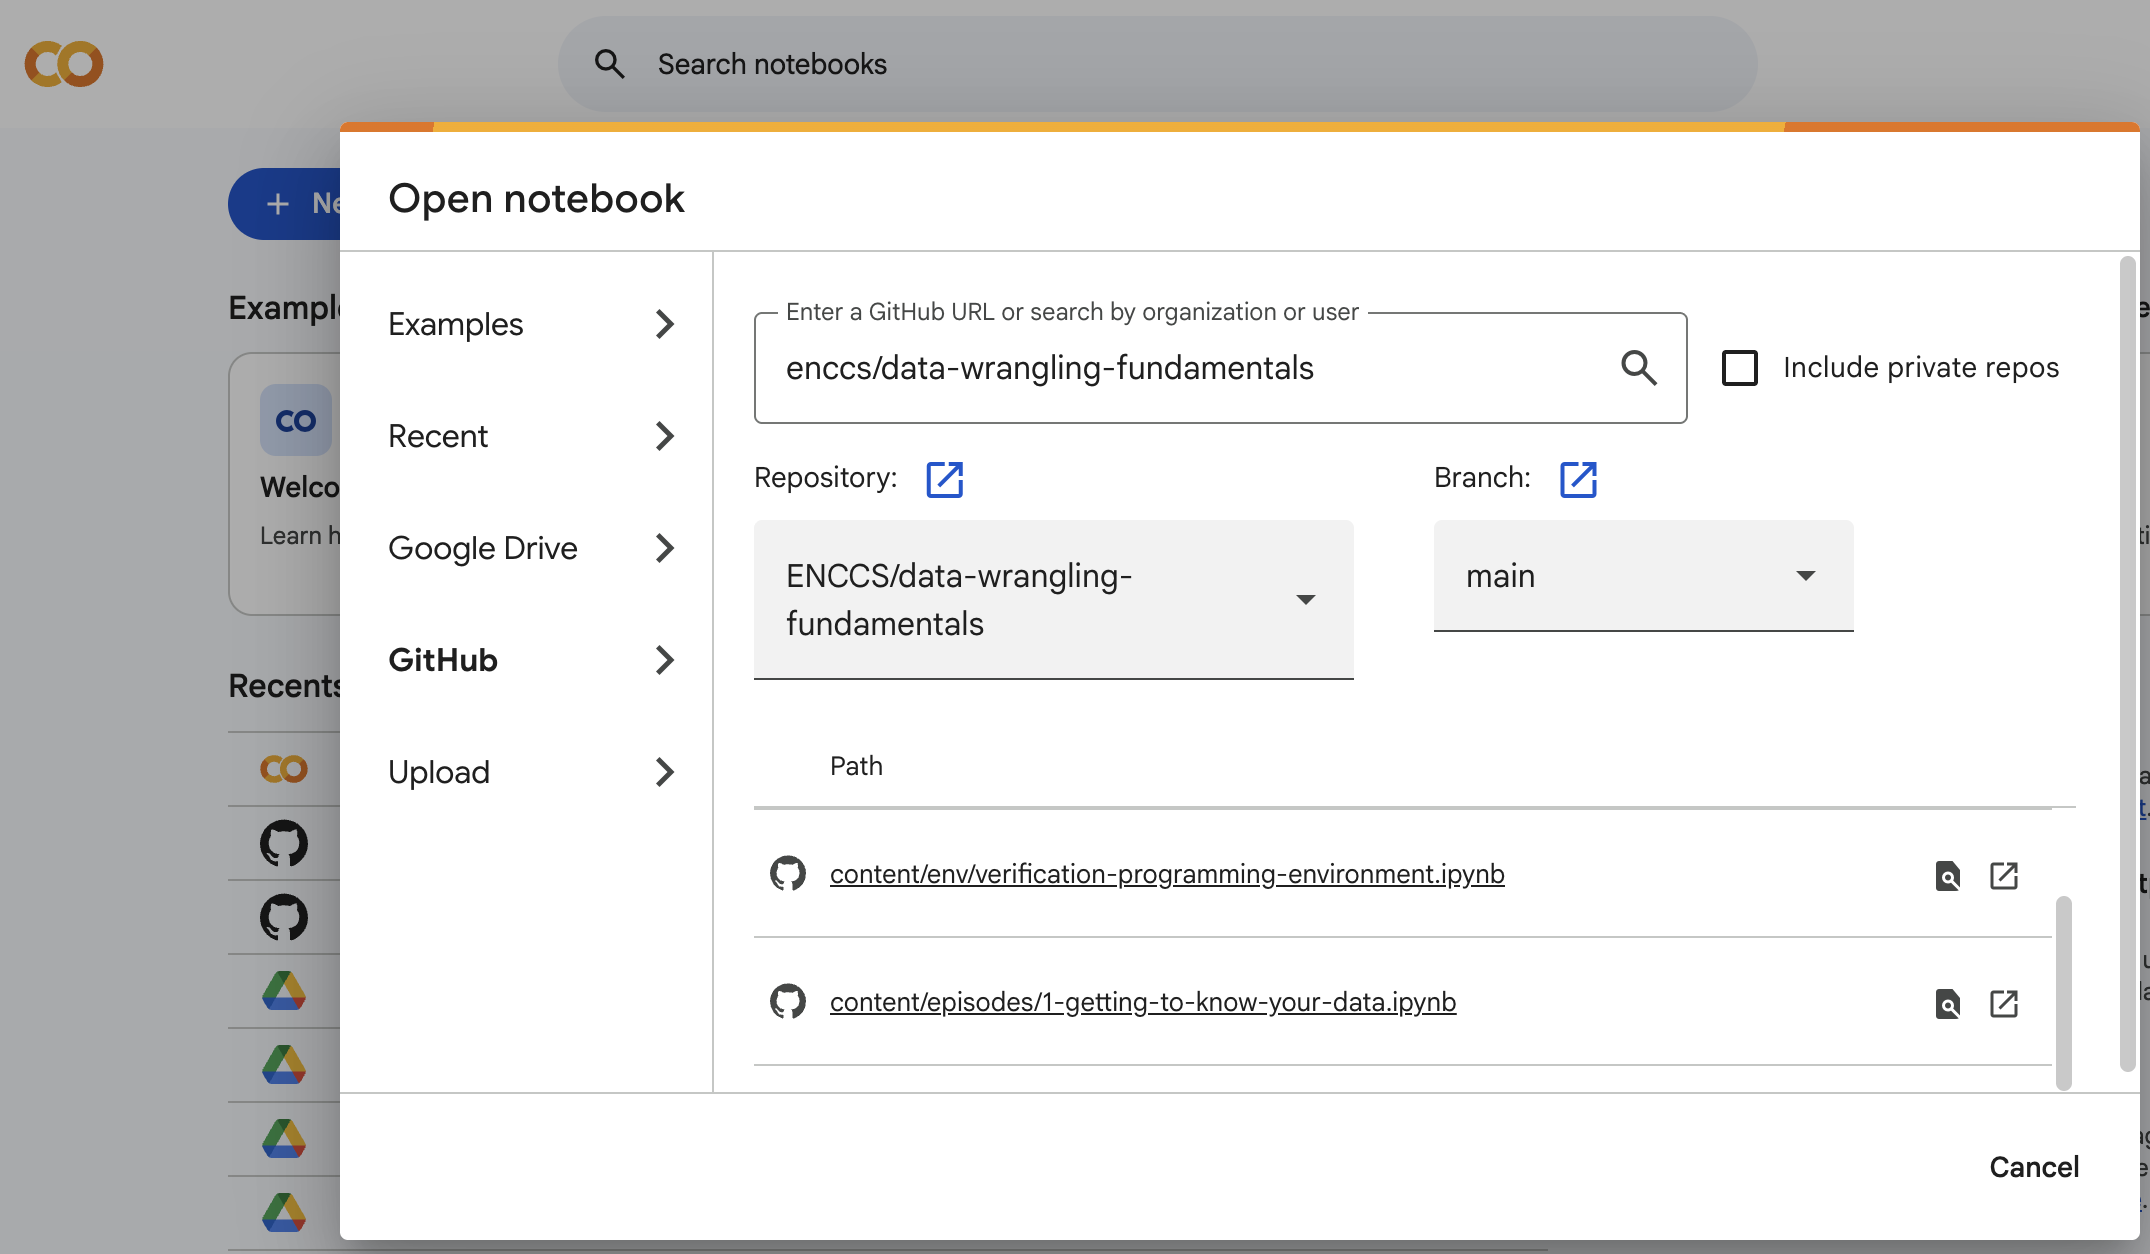
Select GitHub tab, search for enccs, and then choose repository
ENCCS/data-wrangling-fundamentalsto open desired Jupyter Notebooks.
display(Image("./notebooks-from-github-to-colag.png", width=1024))
2.2 Connect to a hosted runtime
In Google Colab, go to top-right corner and click Connect to link your notebook to a Google-hosted runtime environment.
If you need GPU or TPU acceleration, select Runtime → Change runtime type, then choose desired hardware accelerator.
2.3 Run tutorials
After connecting, follow instructions inside Jupyter NBs.
You can run each cell individually by pressing Shift + Enter, or execute entire notebook using Runtime → Run all.