Setup
Please follow the instructions on this page to install both Julia and VS Code with the Julia plugin on your machine.
Installing Julia
There are two ways to install Julia:
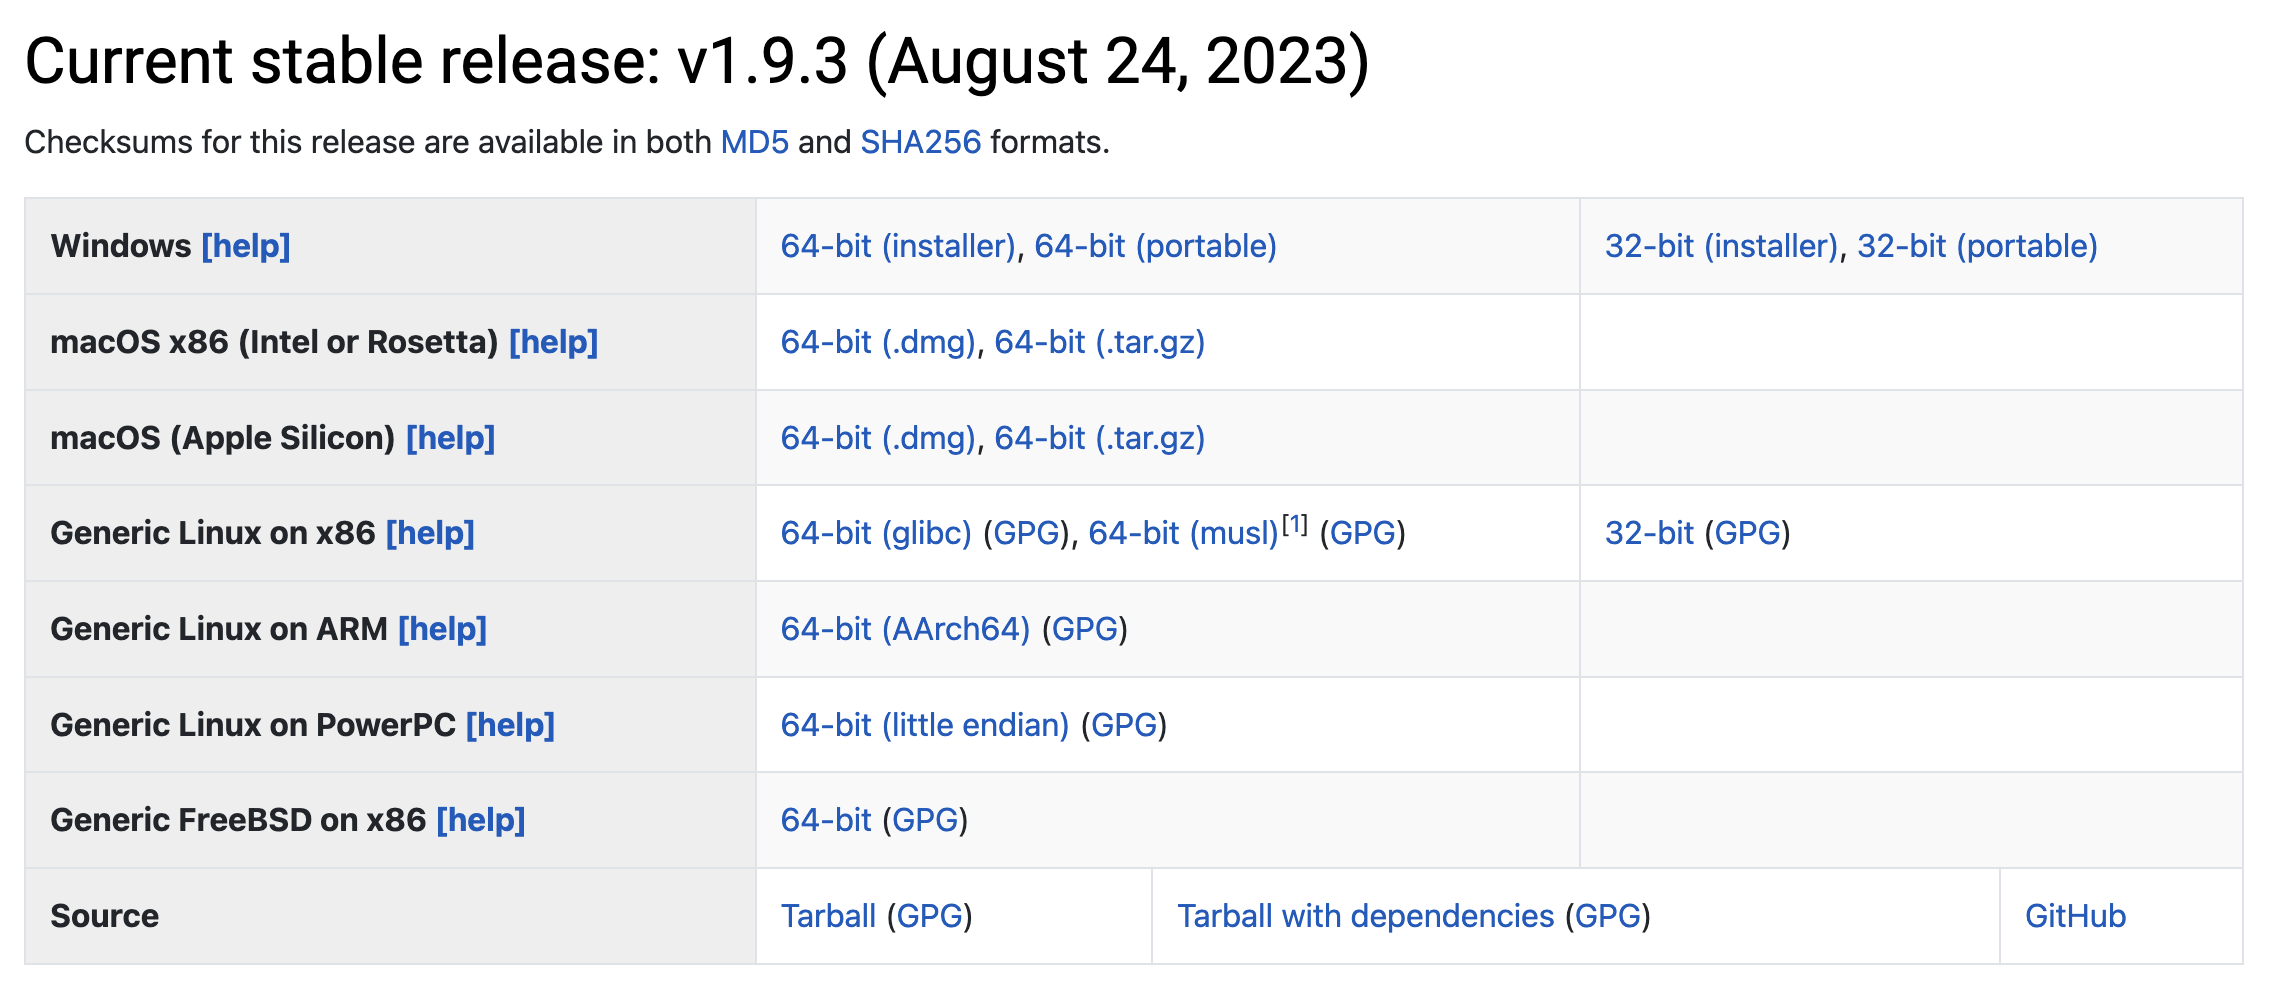
Downloading an installer for your operating system for the latest stable Julia version.
Using Juliaup, the Julia version manager.
Option 2 is (as of October 2022) the recommended installation method on Windows, and while juliaup is marked as a pre-release on MacOS and Linux it already works smoothly there too.
The benefit of juliaup is that it allows users to install specific Julia versions, it alerts users when new Julia versions are released and it provides a convenient Julia release channel abstraction.
Both installation methods are documented here. If you are on Windows we recommend using juliaup. If you are on MacOS or Linux, choose the installation method you feel most comfortable with.
1. Using the Julia installer
First download the latest stable release of Julia for your operating system from the julialang.org website.
Follow the instructions to complete the installation.
Platform-specific instructions can be found at https://julialang.org/downloads/platform/. It is convenient to be able to run Julia from the command line, so follow the instructions for “adding Julia to PATH”. For Windows users who do not already have a terminal installed, we recommend to install the Windows Terminal from the Microsoft Store.
2. Using Juliaup
Full instructions can be found at HERE.
In short:
On Windows you can install Julia and Juliaup either through the Windows store or on a command line by executing
winget install julia -s msstore.On MacOS or Linux, type
curl -fsSL https://install.julialang.org | shon a command line and follow the instructions.If your home directory is not the optimal location for installing Julia, answer “no” to the question “Do you want to install with these default configuration choices?” and enter the appropriate directory path.
After the installation your shell configuration file(s) will be updated (e.g.
.bashrc).
Source this file to update your PATH variable:
. $HOME/.bashrc.
If you want or need to install Julia yourself on an HPC system, keep the following points in mind:
Install Julia on the cluster’s high-performance parallel file system as this will improve performance of large parallel Julia jobs.
Installation of Julia packages can take up significant disk space and include a large number of files - make sure to use a file system with sufficiently high quotas for both disk space and number of files.
When in doubt, ask the support team of the cluster for guidance!
3. Checking your installation
Regardless of how you installed Julia, please ensure that you can open the Julia REPL by
typing julia on the command line in a terminal, or by clicking the Julia
icon on your Desktop or Applications folder. You should
see something like in the image below (nevermind the version number).
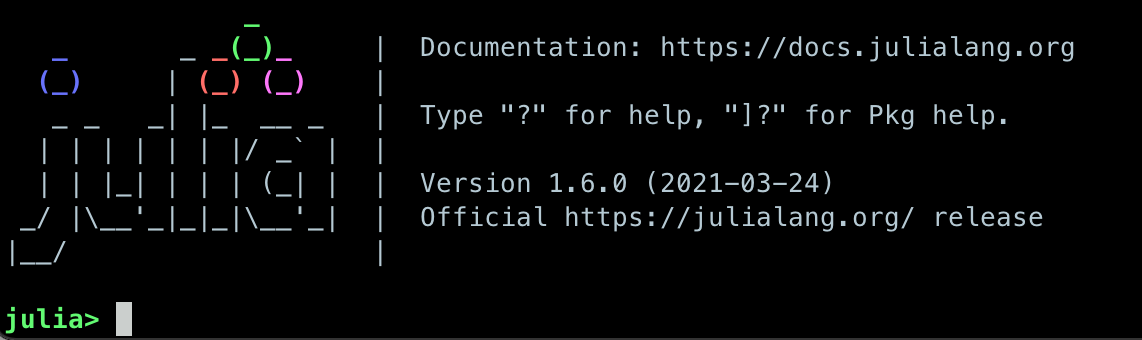
To exit the REPL again, hit CTRL-d or type exit().
4. Installing other packages (optional)
On HPC systems it is often recommended to install own programs and packages in a directory different
from the home directory ($HOME). The JULIA_DEPOT_PATH variable controls where Julia’s
package manager (as well as Julia’s code loading mechanisms) looks for package registries,
installed packages, named environments, repo clones, cached compiled package images, configuration files,
and the default location of the REPL’s history file.
Since the available file systems can differ significantly between HPC centers, it is hard to make a general statement about where the Julia depot folder should be placed.
Generally speaking, the file system hosting the Julia depot should have
Good parallel I/O
No tight quotas on disk space or number of files
Read and write access by the user
No mechanism for the automatic deletion of unused files (or the depot should be excluded as an exception)
On some systems, it resides in the user’s home directory. On other systems, it is put on a parallel scratch file system.
To prepend the JULIA_DEPOT_PATH variable with a new directory, type
export JULIA_DEPOT_PATH="/path_to_directory/v$(VERSION.major).$(VERSION.minor):$JULIA_DEPOT_PATH
(put this in the shell configuration file, e.g. .bashrc or .bash_profile).
Installing Visual Studio Code
First install VSCode according to the official documentation: https://code.visualstudio.com/Download
Installing the VSCode Julia extension
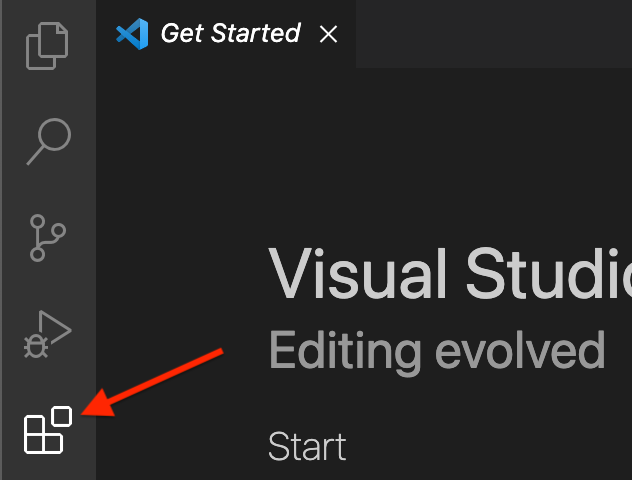
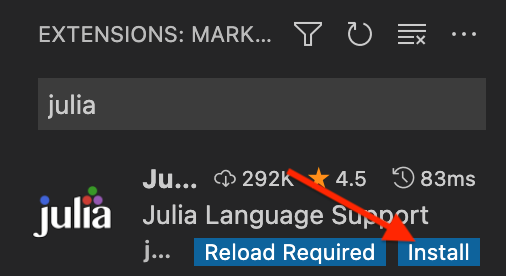
After starting VSCode, click the Extensions button on the left-side menu, type Julia and click Install to install the Julia extension.
You now need to configure the Julia extension and set the path to the Julia executable. Click the cogwheel button next to the Julia extension:
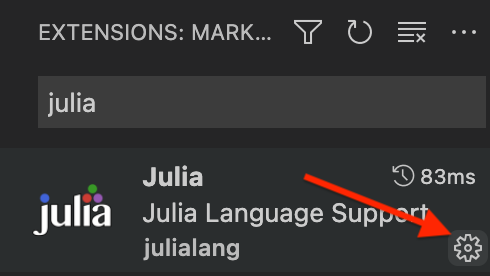
Then find the “Julia: Executable Path” field:

In this field enter the path to the Julia executable that you have installed.
If you are curious, scroll through the other possible configuration settings!
Installing packages
A number of Julia packages is used in this lesson. These can be installed on-the-fly during a workshop, but you can also follow the instructions below to install all packages in your global Julia environment.
Copy-paste the following text into a file called Project.toml, which you can for example place under a new directory julia in your home directory:
name = "Julia-for-HPC"

[deps]
BenchmarkTools = "6e4b80f9-dd63-53aa-95a3-0cdb28fa8baf"
Dagger = "d58978e5-989f-55fb-8d15-ea34adc7bf54"
Distributed = "8ba89e20-285c-5b6f-9357-94700520ee1b"
LinearAlgebra = "37e2e46d-f89d-539d-b4ee-838fcccc9c8e"
MPI = "da04e1cc-30fd-572f-bb4f-1f8673147195"
MPIPreferences = "3da0fdf6-3ccc-4f1b-acd9-58baa6c99267"
Plots = "91a5bcdd-55d7-5caf-9e0b-520d859cae80"
Profile = "9abbd945-dff8-562f-b5e8-e1ebf5ef1b79"
PyCall = "438e738f-606a-5dbb-bf0a-cddfbfd45ab0"
SharedArrays = "1a1011a3-84de-559e-8e89-a11a2f7dc383"
StaticArrays = "90137ffa-7385-5640-81b9-e52037218182"
Then open a Julia REPL and specify the location of the Project.toml file:
$ julia --project=/path/to/Project.toml
Then copy-paste the following code into your Julia session:
using Pkg
Pkg.instantiate()
It could take a couple of minutes to download and install the packages. After it completes you should be able to list all installed packages:
Pkg.status()

# Status `~/julia/Project.toml`
#   [6e4b80f9] BenchmarkTools v1.3.1
#   [da04e1cc] MPI v0.20.3
#   [3da0fdf6] MPIPreferences v0.1.6
#   [91a5bcdd] Plots v1.35.6
#   [90137ffa] StaticArrays v1.5.9
#   [8ba89e20] Distributed
#   [37e2e46d] LinearAlgebra
#   [9abbd945] Profile
#   [1a1011a3] SharedArrays
Configuring MPI
Using MPI in Julia requires an MPI library. On an HPC system it is best to use a preinstalled
MPI library, but on personal computers it’s best to let the MPI.jl package install its own
library and wrapper for the mpiexec command. Do this by:
using MPI
MPI.install_mpiexecjl()
This installs a mpiexecjl under ~/.julia/bin, which should be added to your
PATH variable.
Using HPC systems
We can load the Julia environment on LUMI as follows:
$ module use /appl/local/csc/modulefiles
$ module load julia
Let’s start an interactive Julia session on the login node using multiple threads:
$ julia --threads 8
Next, we install and precompile packages for distributed, MPI and GPU computing:
import Pkg
Pkg.add("MPI")
Pkg.add("AMDGPU")
Pkg.add("ClusterManagers")
Pkg.add("Dagger")
Pkg.precompile()
To start a new bash session on a reserved interactive CPU node for multithreaded or distributed jobs:
$ srun --account=project_465001310 --partition=small --nodes=1 --ntasks-per-node=1 --cpus-per-task=8 --mem-per-cpu=1000 --time=00:15:00 --pty bash
To run MPI jobs on a CPU node:
$ srun --account=project_465001310 --partition=small --nodes=1 --ntasks-per-node=8 --cpus-per-task=1 --mem-per-cpu=1000 --time=00:15:00 --pty bash
To run instead on a GPU node:
$ srun --account=project_465001310 --partition=small-g --nodes=1 --ntasks-per-node=1 --cpus-per-task=16 --gpus-per-node=1 --mem-per-cpu=1750 --time=00:15:00 --pty bash
To run a batch job to run an MPI job, create a job script similar to the following:
#!/bin/bash -l
#SBATCH --account project_465001310
#SBATCH --time 00:15:00
#SBATCH --partition small
#SBATCH --nodes 1
#SBATCH --ntasks-per-node=1
#SBATCH --cpus-per-task=8

module use /appl/local/csc/modulefiles
module load julia
julia script.jl
#!/bin/bash -l
#SBATCH --account project_465001310
#SBATCH --time 00:15:00
#SBATCH --partition small
#SBATCH --nodes 1
#SBATCH --ntasks-per-node=8

module use /appl/local/csc/modulefiles
module load julia
module load julia-mpi
srun julia script.jl
#!/bin/bash -l
#SBATCH --account project_465001310
#SBATCH --ttime 00:15:00
#SBATCH --partition small-g
#SBATCH --nodes 1
#SBATCH --ntasks-per-node=8
#SBATCH --cpus-per-task=16
#SBATCH --gpus-per-node=1

module use /appl/local/csc/modulefiles
module load julia
module load julia-amdgpu
julia --project script.jl
To reserve an interactive node (replace project (-A), QOS (-q) and reservation (–res) as needed):
$ salloc -A p200051 -t 0:10:0 -p cpu -n 1 -q dev --res cpudev
To run a batch job to run an MPI job, create a job script similar to the following:
#!/bin/bash -l
#SBATCH -A p200051
#SBATCH -t 00:10:00
#SBATCH -q test
#SBATCH -p cpu
#SBATCH -N 1
#SBATCH --ntasks-per-node=8

module load OpenMPI
module load Julia

n=$SLURM_NTASKS
srun -n $n julia mpi_program.jl
Installing JupyterLab and a Julia kernel (Optional)
JupyterLab can most easily be installed through the full Anaconda distribution of Python packages or the minimal Miniconda distribution.
To install Anaconda, visit https://www.anaconda.com/products/individual , download an installer for your operating system and follow the instructions. JupyterLab and an IPython kernel are included in the distribution.
To install Miniconda, visit
https://docs.conda.io/en/latest/miniconda.html , download an installer
for your operating system and follow the instructions. After
activating a conda environment in your terminal, you can install
JupyterLab with the command conda install jupyterlab.
Add Julia to JupyterLab
To be able to use a Julia kernel in a Jupyter notebook you need to
install the IJulia Julia package. Open the Julia REPL and type:
using Pkg
Pkg.add("IJulia")
Create a Julia notebook
Now you should be able to open up a JupyterLab session by typing
jupyter-lab in a terminal, and create a Julia notebook by clicking
on Julia in the JupyterLab Launcher or by selecting File > New > Notebook
and selecting a Julia kernel in the drop-down menu that appears.